
Learning how to invert on a pole is the point where pole starts to feel like a superpower. It’s also the move that convinces most beginners their body is broken. It isn’t. A basic invert is part strength, part timing and part trust, and every one of those can be trained.
This guide follows the progression most instructors use, from living room drills to your first time upside down with your legs hooked around the pole. Practice the drills, then take your invert to a qualified instructor with a crash mat underneath you. A blog post can explain the shape. It can’t catch you.
You will learn:
- What an invert is and the signs you’re ready to try one
- Drills off the pole and on it that build the right strength
- The basic invert from a tuck, step by step, including where your hands and legs go
- How to come down safely, and why it feels impossible at first
- How crash mats, spotters and grip keep you safe
What is an invert in pole dancing?
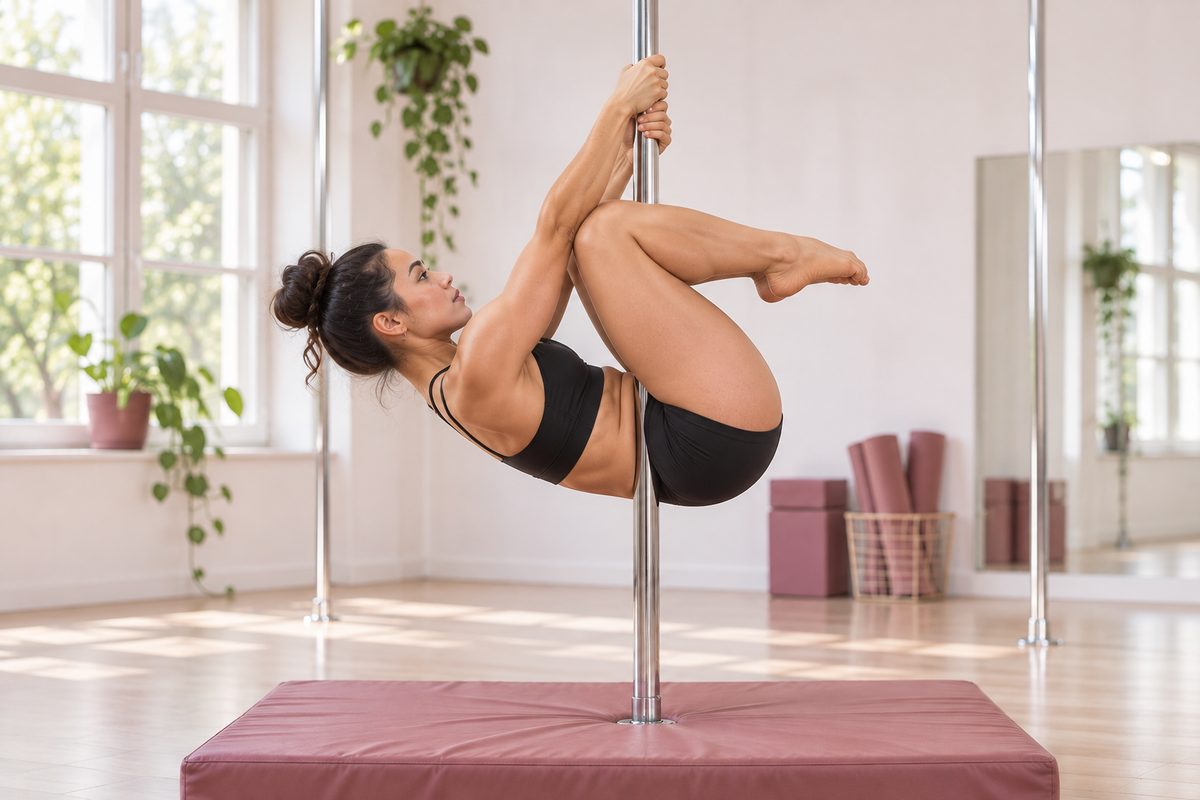
An invert is any pole move where your hips end up higher than your head. That covers a huge family of tricks, but your first one will almost certainly be the basic invert: you lift your knees into a tuck, tip backward until you’re upside down, then hook your legs around the pole so your legs take your weight instead of your arms.
So much grows out of it. Leg hangs, the crucifix, the butterfly and, much later, the Ayesha all start from being comfortable upside down, which is why many studios treat the invert as the line between beginner and intermediate. It’s one of the foundations in our 27 beginner pole moves for the same reason.

Am I ready to invert? Strength and readiness signs
There’s no magic number of classes. Our post When Can I Do A Pole Invert? goes deeper into the timing question, but these are the signs most instructors look for:
- You can climb and hold a pole sit without panicking about your grip.
- You can do several slow knee tucks from a bent-arm hold at the pole (the drill below) on both sides, lowering with control rather than dropping.
- You can hold a tuck on the floor with your lower back pressed down for a good few breaths.
- Your shoulders feel stable in a bent-arm hold, with no pinching or clicking.
- You don’t have a current shoulder, wrist, neck or back injury.
- Your instructor has watched your tuck and given you the nod.
You don’t need to be able to do a pull-up. The invert relies far more on your core, your lats and the muscles that keep your shoulder blades down. If upper-body strength is your weak link, our guide to getting upper-body strength for pole dancing has exercises you can do at home.
Drills to build your invert, off the pole and on it
The invert breaks down into two jobs: curling your knees up toward your chest, then tipping your hips back over your shoulders. Most beginners can do the first. These drills train both.
Off the pole
Tuck holds. Lie on your back, pull your knees in toward your chest and press your lower back into the floor. Lift your head and shoulders slightly and hold. When that gets easy, sit up with your hands on the floor beside your hips and lift both feet, keeping your knees tucked.
Knee raises and reverse crunches. Lying on your back, raise your knees toward your chest, then keep going until your hips peel off the floor. That little curl of the pelvis is exactly the movement that tips you upside down on the pole. If you have a pull-up bar, hanging knee raises with bent arms are an excellent next step. For a full at-home routine, try our core exercises for pole dancers.

Bent-arm holds. Hang from a bar with your elbows bent and your shoulders pulled down away from your ears. You’re teaching your arms to stay bent and strong while your legs do something else, which is the whole invert in a nutshell.
On the pole
Crunch with a bent-arm hold. Stand beside the pole on your strong side and take a baseball grip (more on that below). Lean back slightly with your arms bent, then lift both knees toward your chest so your feet leave the floor. Hold for a moment and lower slowly. Do a few on each side. This is the drill most instructors use to check readiness, so it’s worth getting really clean.
Floor invert at the base. Lie on your back on a mat with the top of your head near the base of the pole and hold the pole with both hands. Curl your knees in and roll your hips up so your legs reach the pole above you. From here you can practice the leg hooks (outside leg in front, inside leg behind) with your shoulders still safely on the floor. It’s a great way to learn the shape before you have to lift into it.
Supported invert with a spotter. Once your crunch is solid, your instructor can spot you through the full invert, usually with a hand at your hips or lower back to help you tip past the tricky point. Spotting is a skill. A trained instructor knows where to stand and how to take your weight, so leave this one for class rather than recruiting your roommate.
Pro tip
Film your bent-arm crunch from the side. If your knees are level with your hips but your hips are still hanging below your hands, you’re lifting your legs without tipping your pelvis. That’s the bit to work on.
How to invert on a pole from a tuck, step by step
These steps describe the tuck invert into a basic invert, the version most studios teach first. Put a crash mat down, warm up your shoulders and wrists properly and have your instructor nearby for your first attempts.
- Pick your strong side. Stand right beside the pole with your stronger arm and hip closest to it. Your inside foot should be close to the base.
- Set your hands. Wrap your inside hand around the pole at about forehead height, then place your outside hand directly below it, touching, with your thumbs wrapped around the pole. This is the baseball grip, like holding a bat. Some studios teach a lower bottom hand instead, so follow your instructor if they cue it differently.
- Get your shoulders ready. Bend your elbows, draw your shoulder blades down and keep your chest close to the pole. Your arms should feel like strong hooks, not wet noodles.
- Tuck. Lean back slightly and lift both knees to your chest so your feet leave the floor. No jumping and no kicking. You want the move to come from your core.
- Tip back. Keeping your arms bent, curl your tailbone up and let your head and shoulders drop back so your hips rise above your hands. Look toward the floor behind you. Your knees should travel up past your hands. This is the moment it either clicks or doesn’t, and it’s the step that takes the most practice.
- Hook your outside leg. Open your knees into a V. Bring your outside leg across the front of the pole and bend the knee so the pole sits in the crease behind your knee, well above your hands.
- Hook your inside leg. Bring your inside leg behind the pole and cross your ankles so the pole is held between your thighs. Squeeze your legs together. Bare skin on the backs of your knees and inner thighs is what holds you here.
- Hold and breathe. Keep both hands on the pole. Stay for a couple of breaths, notice how much of your weight your legs are holding, then come down.
Letting go with your hands to make a crucifix comes later, once your leg grip is reliable. Your instructor will tell you when.
How to come down from an invert safely
Getting down deserves as much attention as getting up, because slips tend to happen when your arms are tired. For your first inverts, simply reverse the way you went up:
- Keep your hands where they are and your elbows bent.
- Uncross your ankles and take your inside leg off the pole, then your outside leg.
- Pull your knees back into a tight tuck.
- Slowly lower your hips until you’re upright, then put your feet down gently.
- Stand still for a second before you walk off, especially if your head feels fuzzy.
Never let go with your hands while you’re upside down at this stage, and don’t slide down the pole head first. Fancier exits come later. If your arms start shaking, come down while you still have something left.
Why inverting feels impossible at first
Almost everyone hits a wall where their knees come up and then nothing happens. You hang there in a little ball, wondering how anyone has ever done this. It’s rarely a pure strength problem. Your body has never had to tip its hips over its head while holding onto something, so your brain has no map for it yet. Fear plays a part too. Going backward into a space you can’t see feels unnatural, and your body quietly puts the brakes on.
Repetition fixes most of this. These are the mistakes we see most often:
- Straightening your arms. The moment your elbows lock, your hips drop away from the pole. Keep them bent the whole way.
- Pulling instead of tipping. You can’t drag yourself upside down with your arms. The arms hold steady while your core tips your pelvis back.
- Kicking or jumping up. Momentum gets you there without control, and control is what gets you down safely.
- Shrugging. Shoulders up by your ears means your shoulder joint is taking the load instead of the muscles around it.
- Hooking too low. If your knee lands on your hands, you didn’t tip far enough. Bend your elbows more and aim higher up the pole.
- Covering your legs. Leggings slide right off a pole. Wear shorts so the skin behind your knees and on your thighs can grip. Our guide to what to wear to pole dancing classes covers the rest of your kit.
Invert safety: crash mats, spotters and grip
Inverting means trusting your grip with your head nearest the floor, so take safety seriously, especially for your shoulders. In a 2022 study that followed pole dancers from Australian studios for a year, the shoulder was the most commonly injured area.1 That’s one more reason to keep your shoulders engaged and stop when you’re tired. Our guide to common pole dancing injuries covers prevention in more detail.
Use a crash mat every time. A proper pole crash mat sits around the base and gives you a softer landing if a hand or knee slips. A yoga mat isn’t thick enough. Our roundup of the best pole dancing crash mats compares the options.
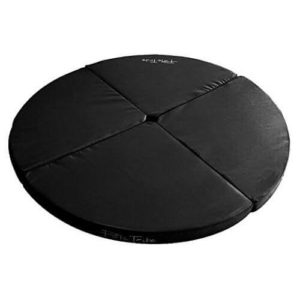
Best for: Practicing inverts at home
Pole Tribe Crash Mat
A round, folding crash mat that wraps around the base of the pole, so you're covered whichever side you fall toward. It folds away when you're done, which helps in smaller apartments.
- Wraps all the way around the pole
- Folds for storage
- Check the current size and thickness against your pole and ceiling height before you buy
Learn with a qualified instructor. Your first inverts belong in a class, where a trained spotter can support your hips and correct your shape before bad habits stick. A friend grabbing your legs is more likely to pull you off balance. Once your invert is consistent, practicing at home is fine with the right setup. Read our safety tips for pole dancing at home first, and check your pole is installed and tightened properly before every session.
Sort out your grip. Clean the pole before you start and skip body lotion on training days. Sweaty hands are the classic invert killer, and a drying grip aid can make a real difference. Our comparison of all the pole dancing grip aids will help you find one that suits your skin.
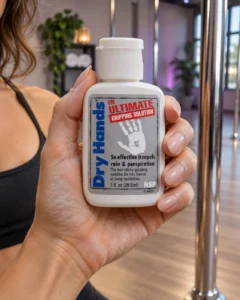
Best for: Sweaty hands that slip in the tuck
Dry Hands
A liquid grip aid you rub into your palms and let dry before you climb. It's a good first grip to try if your hands get damp as soon as you start working hard.
- Not sticky or greasy once dry
- Quick to apply between attempts
- You'll need to reapply during a long session
- Dry skin may need a tackier grip instead
If something hurts, stop. Sharp pain, pain that lingers after class or anything in your neck is a reason to see a doctor or physical therapist, not to push through.
Frequently asked questions
How long does it take to learn to invert on a pole?
It varies hugely with strength, body proportions, how often you train and how comfortable you are upside down. Many dancers get there after a few months of regular classes, and plenty take longer. Doing the drills between classes usually speeds things up.
Can I learn to invert at home?
You can do nearly all the conditioning at home, including tuck holds, knee raises and the bent-arm crunch at your pole. For your first full inverts, have an instructor there to spot you.
Is it bad to kick up into an invert?
Most instructors discourage it while you’re learning. A kick can get you upside down before you have the control to stay there, and it hides the strength gaps you need to work on. Learn the controlled tuck first.
Why do I get a head rush when I’m upside down?
A slightly woozy feeling is common in the early days, and it usually eases as your body gets used to being inverted. Come down slowly, stand still for a moment and don’t invert straight after a big meal. If you feel faint, get headaches or have blood pressure concerns, check with your doctor before you continue.
Should I learn to invert on a static or a spinning pole?
Static. A spinning pole moves as you shift your weight, which makes the tip-back much harder to control. Try spin mode once your static invert is solid.
Where to go from here
Pick two or three drills from this guide and do them a few times a week. Keep the crunch slow, keep your elbows bent and film yourself now and then to watch your hips creep higher. When your instructor says you’re ready, put the mat down and try the full invert with them beside you. The first time your knees sail past your hands and your legs lock around the pole, you’ll understand why everyone in class keeps grinning about it.
Sources
- Nicholas J, Weir G, Alderson JA, Stubbe JH, van Rijn RM, Dimmock JA, Jackson B and Donnelly CJ, “Incidence, Mechanisms, and Characteristics of Injuries in Pole Dancers: A Prospective Cohort Study”, Medical Problems of Performing Artists 37(3), 2022. The shoulder was the most reported injury site (20.4% of injuries) among dancers from 41 Australian studios followed for 12 months. James Cook University research repository ↩︎
Want more articles like this?
Join our mailing list to be the first to know about the latest pole dancing news and products.
We only include the best content in our newsletter, which includes marketing material. Privacy Policy
NO SPAM – EVER. YOU CAN UNSUBSCRIBE AT ANY TIME.