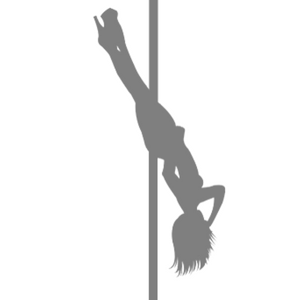

This is a general guide on how to install a pole dancing pole at home.
Have you ever wanted to pole dance but didn’t know how?
Most people start pole dancing in a studio. But I’m going to teach you how to install your own pole at home. Installing an in-home pole is doable with modern dance poles that are designed for home use.
Quick Summary
- Dance poles can come in a variety of materials, including chrome, stainless steel, brass, titanium, or silicone-covered.
- Most modern poles are held in place using tension and do not require drilling or permanent fixtures.
- Poles should be 4-5 feet away from the wall to allow for full body movement and spinning.
- Floor-to-ceiling poles must be mounted directly below a joist in the ceiling.
- Freestanding poles do not touch the ceiling and should have a wide and heavy base to ensure stability.
- Choose your pole based on your ceiling height and available space.
There are different types of home pole dancing poles available:
- Floor-to-ceiling poles that are held in place using pressure, they can be mounted to the ceiling but this is optional.
- Freestanding dance poles with a wide, heavy base, these can be used outdoors or indoors without being fixed to the ceiling.
Before you get started – read our guide on “Best Dance Poles for Home Use” to make sure you get the best and most sturdy pole dancing pole for your home.
The best brand of pole dancing pole is X Pole – they are the original manufacturers of home pole dancing equipment and they continue to innovate new products and safer designs.
Avoid buying cheap pole dancing poles on Amazon if you’re serious about the sport.
X Pole and Lupit Pole are both trusted brands you can be confident in using. Tap below to visit X Pole’s store 👇

Step 1: Assess Your Space
Before you choose the perfect pole dancing pole to use at home, you need to decide where you’ll be placing the pole and plan around that.
Ideally, you’ll have 4-5 feet of space surrounding the pole so you can fully stretch your body and spin without fear of kicking the wall!
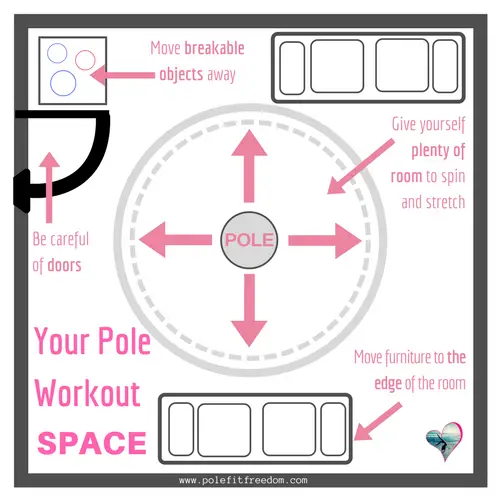
Safety is the most important aspect of pole dancing at home – read our full guide on pole dancing safety here.
Step 2: Decide on the Height/Diameter of the Pole
The next step is to decide how high you need your pole to be. If you’re using a freestanding dance pole, you need to ensure it will fit inside your room, including the base.
Freestanding dance poles should not be in contact with the ceiling
If you’ve gone gone for a floor-to-ceiling dance pole, then the height of the ceiling is incredibly important – there’s no room for error here.
Also – this is very important – the floor-to-ceiling dance pole must be placed directly under a beam/joist. This is vital or it will pop straight through your drywall ceiling!
Use a stud detector to determine the position of your ceiling joists for piece of mind.
Measure Your Ceiling Height
Most dance poles are available in 7’4″ or 9’4″ and are adjustable between those two heights for a precise fit. However, for taller ceilings, additional extension pieces can be purchased if required.
When you measure your ceiling height – measure it twice! Here are some tips for measuring your ceiling ready to install a pole dancing pole:
- If you have carpet – add 2-3 inches onto your final measurement. The base of the pole with compress the carpet so your room is actually slightly taller than you think!
- Use a ladder and a straight, retractable measuring tape. Flexible measuring tapes are not suitable for this
- Get help from a friend so you can get an accurate measurement.
- If you have a vaulted ceiling – measure the heighest point near where the pole will be installed. You will need additional hardware to mount the pole onto your vaulted ceiling
- Add 0.5 inches to your final measurement in you have a popcorn or textured ceiling.
About Dance Pole Diameters
There are several dance pole diameters available:
- 38mm – very skinny pole!
- 40mm – skinny pole
- 42mm – rare, but skinny pole!
- 45mm – standard dance pole width
- 50mm – also a standard width, but less common these days
- 55mm – very thick pole!
When choosing a width for your dance pole, it’s worth keeping in mind:
- 45mm are the most standard dance poles used in gyms, clubs, studios and competitions.
- Skinnier pole dancing poles are good for people with small hands, but they can be more painful on other areas of the body.
- Thicker poles are better suited to those with larger hands.
- Thicker poles are also less painful when gripping with other parts of the body, such as the legs.
Step 3: Decide on the Best Pole Material
- Chrome – a very common choice but it tarnishes easily and it’s not great to grip with your hands
- Stainless Steel – another common choice, very hard-wearing, doesn’t tarnish and it’s slightly easier to grip
- Brass – a superior material for pole dancing poles, but it costs much more
- Titanium – another superior material, many pole dancers report that this is much easier to grip
- Silicone – a soft outer layer to the pole means that it can be used while clothed – more similar to Chinese Pole
- Powder-coated – for extreme grip, not suitable for spins.
Learn more about pole dancing pole finishes here.
Step 4: Check Your Pole
When your pole arrives, check all the components carefully to ensure there is no damage and that everything is present.
If there is a missing part, don’t attempt to assemble the pole.
It’s important to check that there are no chips, dents or imperfections in any of the pieces that arrive as part of your pole dancing pole.
Step 5: Enlist Help From A Friend
The easier, quickest and safest way to install a pole dancing pole at home is not to go it alone.
You’ll get the job done a lot faster and with fewer challenges if you enlist the help of a friend.
Installing a dance pole is a two-person job. One person holds the pole while the other tightens it into position. The second person can also use a magnetic spirit level to ensure the pole is fully straight.
Step 6: Assemble The Pole & Tighten Into Position
Follow the manufacturers guidelines carefully and read the manual to install your pole.
Each dance pole varies slightly, so pay close attention to the manual as it contains important information.
Step 7: Carefully Test The Pole
When you’re confident that you pole is successfully installed. It’s now time to test it, but be careful.
Don’t throw all your weight at the pole straight away. Start by walking around it while applying gentle sideways pressure as you do.
Gradually increase this pressure until you’re able to ‘pull’ all of your body weight away from the pole. The pole should not budge.
Note about new poles:
New pole dancing poles (especially Chrome and stainless steel poles) are freezing cold and will feel very smooth upon first use. You may think that it’s impossible to grip these poles in the same way that you do with the ones in your studio.
However, this is normal. Use some grip aid and understand that the more you use your new pole, the easier it will be to grip.
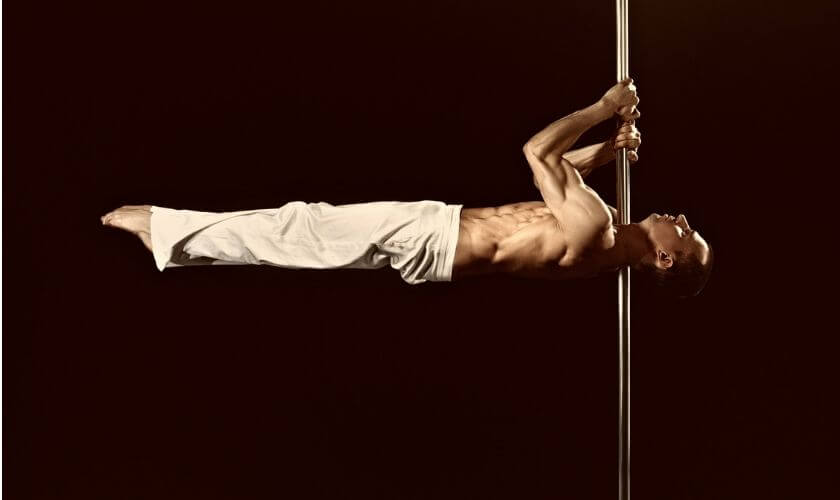
Step 8: Learn New Tricks!
Now your pole is safely installed, it’s time to get spinning and inverting.
Need to learn new pole tricks? Check out the offer below from Open Dance academy 👇
Want to become an amazing pole dancer?
Open Dance Academy has over 450 online lessons, by some world famous pole dancing champions! Join now to get:
***GET 10% OFF OPEN DANCE ACADEMY***
Use the code polefitfreedom to get 10% off Pole Dancing Lessons with Open Dance Academy. This is an exclusive offer for readers of this blog!
Congratulations!
You now have everything you need to install your own pole dancing pole at home. The entire installation process takes about 20-30 minutes, but it’s worth every minute you put into it.
When you and your friends get together for some dancing fun, you’ll be glad you took the time to install your brand new pole. You’ll also progress much faster now as you have loads of extra opportunities to practice!
Further Reading
Here are some more articles that you may find helpful:
- Best Freestanding Dance Poles
- List of Pole Dancing Competitions
- How to Monitor your Pole Progress
- Tips for Dancing on a Spinning Pole
- Pole Dancing Clothes: What to Wear?
- Awesome Pole Dancing Apps for Pole Dancers
- Learn Pole Dancing at Home
- Pole Dancing Without A Pole